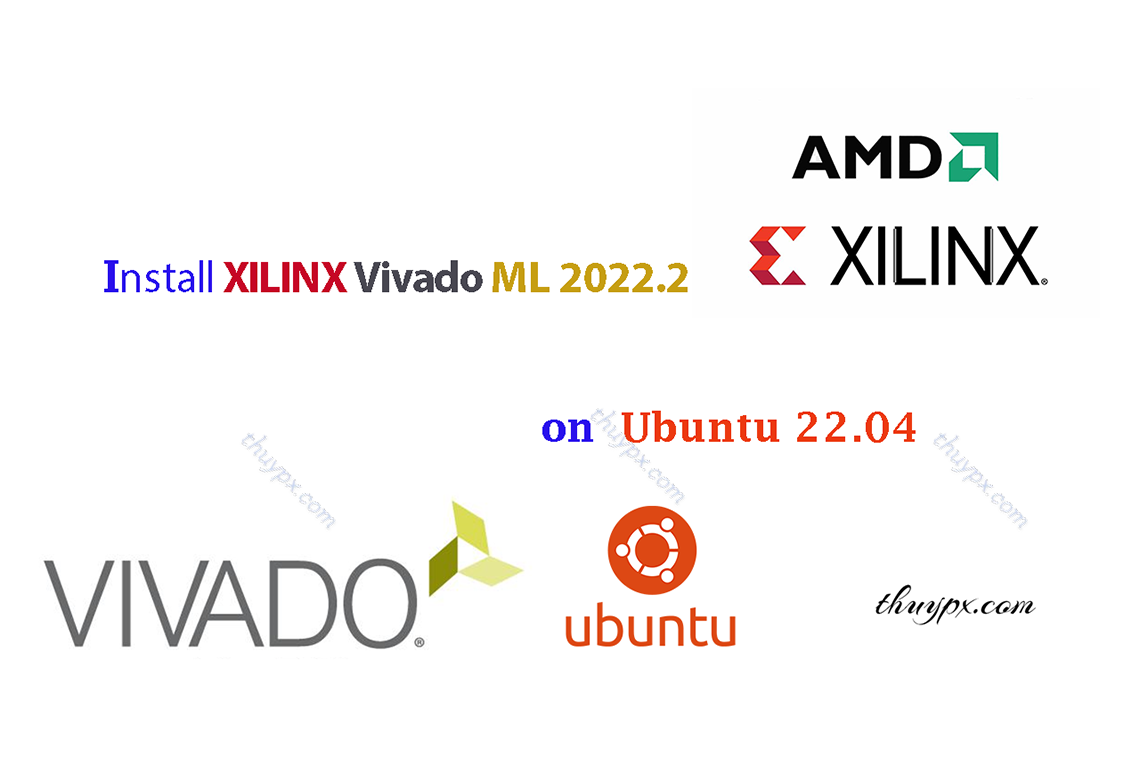
About XILINX Vivado and How to install XILINX Vivado ML 2022.2 on Ubuntu 22.04
Tổng quan về XILINX Vivado và Hướng dẫn cài đặt XILINX Vivado trên Ubuntu.
Hướng dẫn cài đặt Vivado trên Ubuntu.
How to install XILINX Vivado on Ubuntu.
How to install Vivado on Ubuntu.
=> XILINX Vivado ML 2022.2 and Ubuntu 22.04.
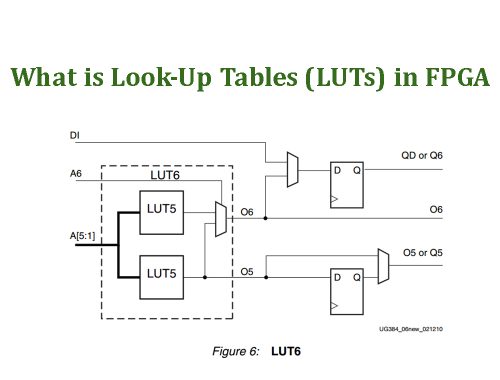
1./ About Xilinx Vivado
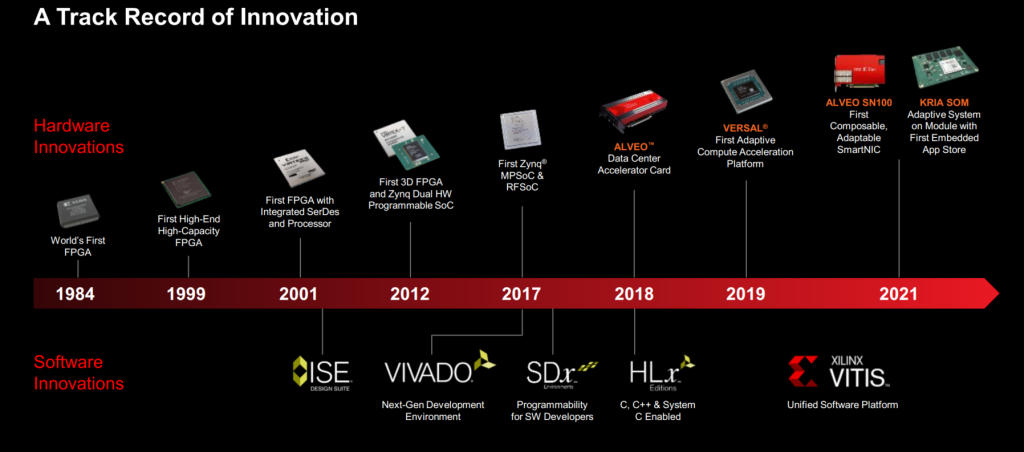
Xilinx Vivado is a software suite developed by Xilinx (now part of AMD) for designing and programming digital circuits, especially for their FPGA (Field Programmable Gate Array) and SoC (System on Chip) devices.
It replaced the older ISE Design Suite around 2012 for their newer devices like:
+ The 7-series FPGAs (Artix, Kintex, Virtex),
+ UltraScale FPGAs: Kintex UltraScale, Virtex UltraScale
+ UltraScale+ FPGAs: Kintex UltraScale+, Virtex UltraScale+, Zynq UltraScale+
+ Versal ACAPs
+ and newer.
Timelines:
+ Before 2012, Xilinx ISE was Xilinx’s primary tool.
+ 2012, As new FPGAs come out, Vivado Design Suit is officially released to accommodate new FPGAs: 7 series and above (Artix-7, Kintex-7, Virtex-7) and newer.
+ 2013-2017: Vivado develops and gradually completely replaces ISE. Support for Zynq SoC lines integrating ARM Cortex-A9.
+ 2018-2021: Supports Zynq UltraScale+ MPSoC, RFSoC, high-end lines.
+ 2022: Vivado continued to develop after AMD acquired Xinlinx.
Key Features of Xilinx Vivado:
+ RTL-to-Bitstream Design Flow: Full-featured flow from RTL (VHDL/Verilog/SystemVerilog) to bitstream (.bit) generation.
+ High-Level Synthesis (HLS): Converts C/C++ code to RTL for FPGA implementation.
+ IP Integrator (Block Design Tool): Drag-and-drop interface for system-level design using pre-built IP blocks.
+ Multi-Language & Simulation Support: Supports Verilog, VHDL, SystemVerilog. Integrated simulator (XSIM). Co-simulation with 3rd-party tools like ModelSim, Questa, VCS,…
+ Devices Support: SoCs, 7 Series (Artix-7, Kintex-7, Virtex-7), UltraScale, UltraScale+, Zynq-7000 SoC, Zynq UltraScale+ MPSoC, Versal ACAPs (partial support via Vivado + Vitis)
Versions of Xinlix Vivado:
=> Vivado WebPACK: Free edition with limited device support (Artix-7, Spartan-7).
=> Vivado SDx Edition: Vivado SDx (Software-Defined eXecution), the bridge software development and hardware design using high-level languages like C/C++/OpenCL for FPGA-based acceleration. It has since been deprecated and replaced by AMD Xilinx Vitis (starting 2019).
=> Vivado HLx Editions: Vivado HLx (High-Level Design) – Convert C/C++ code to RTL (HL System Edition), The period 2015~2020 is the strong development period of Vivado HLx. HLx editions gradually replaced by Vivado ML Editions starting with Vivado 2021.1.
+ HL Design Edition
+ HL System Edition (includes HLS, System Generator)
=> Vivado ML Edition: Launched around 2021, is the most modern version of Vivado to date, designing digital circuits for FPGA with Machine Learning support.
=> AMD Xilinx Vitis: AMD Vitis™ Software Platform (formerly Xilinx Vitis) is a unified software development environment for accelerating applications on AMD (formerly Xilinx) hardware — particularly FPGAs, ACAPs (Adaptive Compute Acceleration Platforms like Versal), and embedded processors (such as Zynq SoCs).
+ Where Vivado is mainly for hardware developers (creating FPGA bitstreams from HDL like Verilog/VHDL), Vitis is for software developers — allowing them to write C/C++ or even Python code that can be accelerated on programmable hardware.
+ Vitis Installer = Vitis + Vivado + Libraries + Vitis HLS + Documentations
NOTE:
+ If you just want to design FPGA hardware: Installing Vivado is enough.
+ If you want to do accelerated on programmable hardware on FPGA or AI on FPGA: Vitis is required.
+ When installing Vitis, Vivado is always included, but when installing Vivado separately, Vitis is not included.
+ Vivado WebPACK (free) is also integrated in Vitis for free if using small FPGA lines.
References:
+ Vivado Design Suite Wiki LINK
+ What’s different between Vivado and Vitis? LINK
2./ How to install XILINX Vivado ML 2022.2 on Ubuntu 22.04
NOTE:
+ In this article, I will guide you to install Vivado ML 2022.2 through the installation of Vitis 2022.2, which means that this is a Vivado version integrated with Vitis 2022.2. This is also the reason why the installation takes up more space than installing Vivado separately.
+ You need to prepare a total free hard drive space to store the installation file folder, and the hard drive capacity for installation is about 270~300GB.
Step 1: Download Xilinx Vivado (LINK HERE)
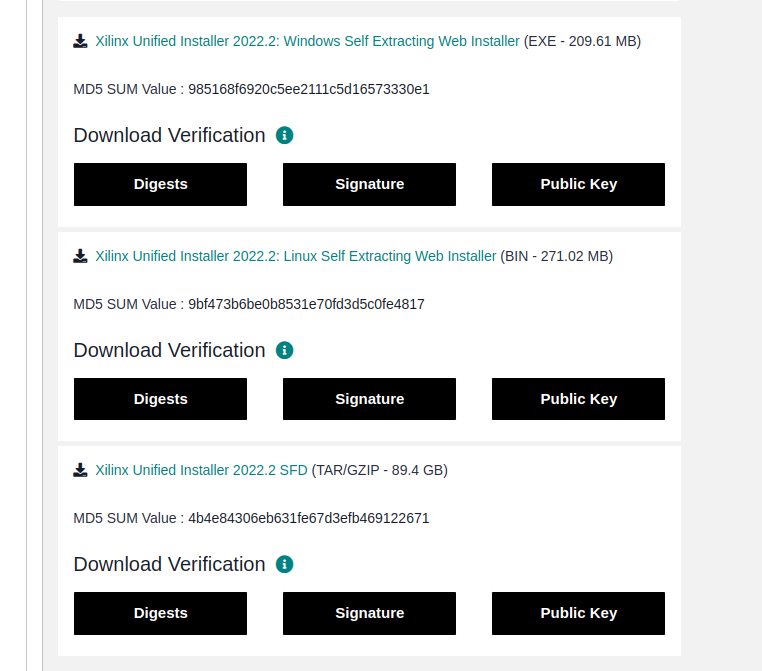
Select Xilinx Unified Installer 2022.2: Linux Self Extracting Web Installer for download install file.
Download file have the name: Xilinx_Unified_2022.2_1014_8888_Lin64.bin
Step 2: Download the files and folders used for installing Xilinx Vivado
+ Open Terminal in the folder containing the installation file downloaded in Step 1. Run the following command lines:
$ chmod +x Xilinx_Unified_2022.2_1014_8888_Lin64.bin
$ ./Xilinx_Unified_2022.2_1014_8888_Lin64.bin
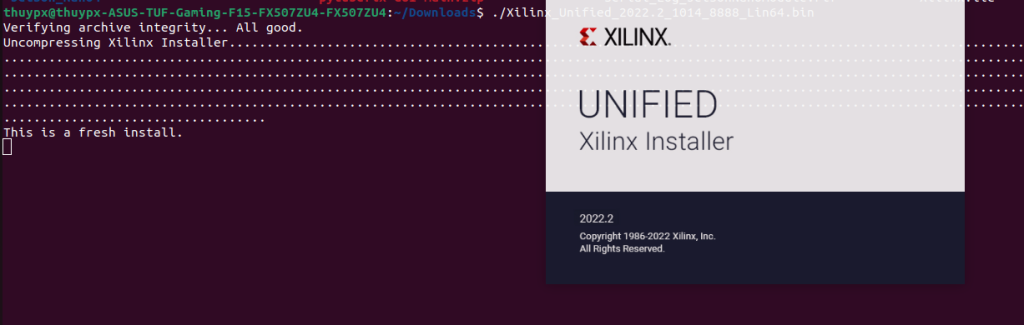
run Xilinx_Unified_2022.2_1014_8888_Lin64.bin file.
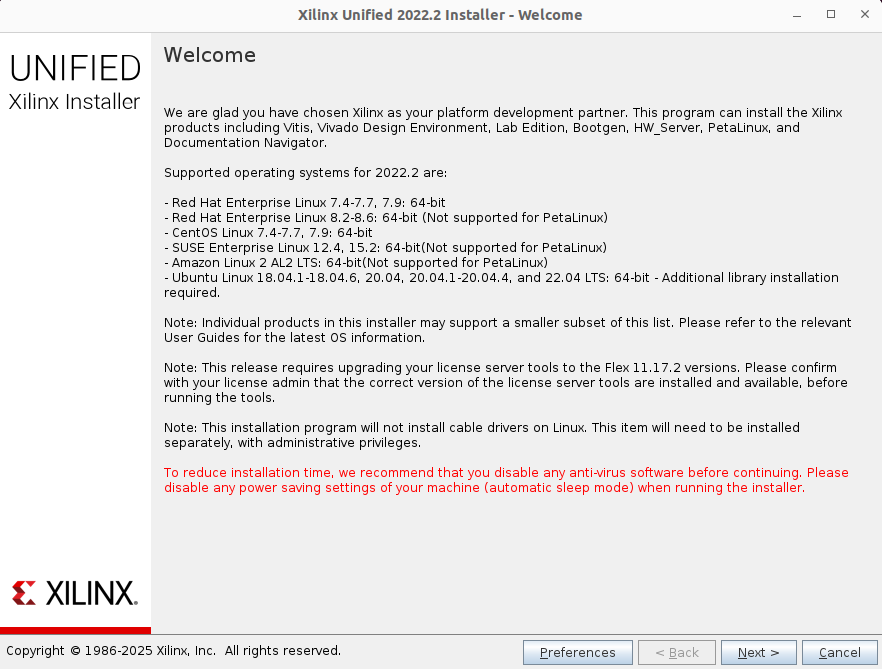
Click Next
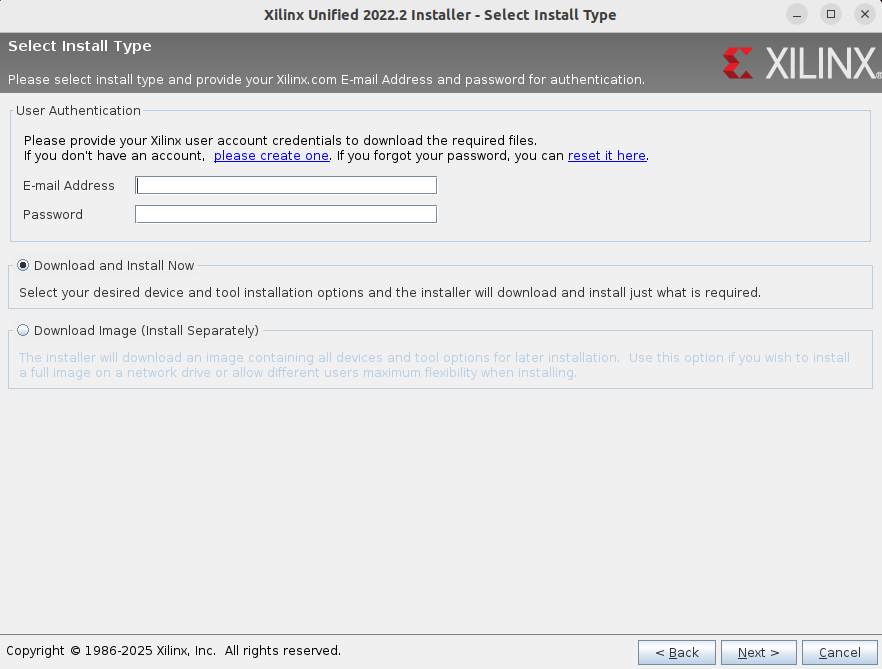
Fill in email and pass with your AMD Xininx account.

Select Download Image (Install Separately) > select the path to the folder you have prepared to save the files and folders used for installing Xilinx Vivado (It have least 90GB of free space.) > click Next.
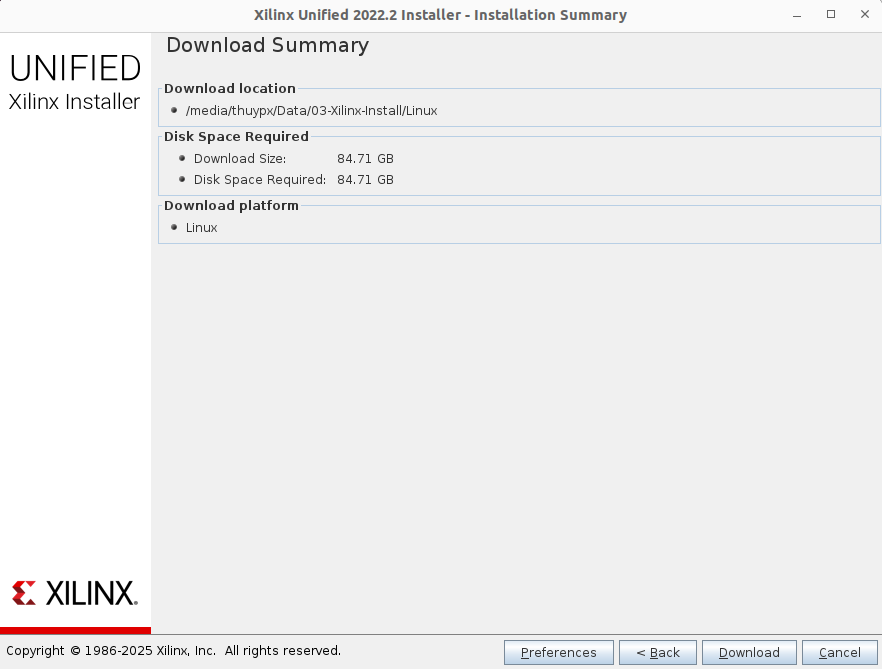
Click Download and waiting.
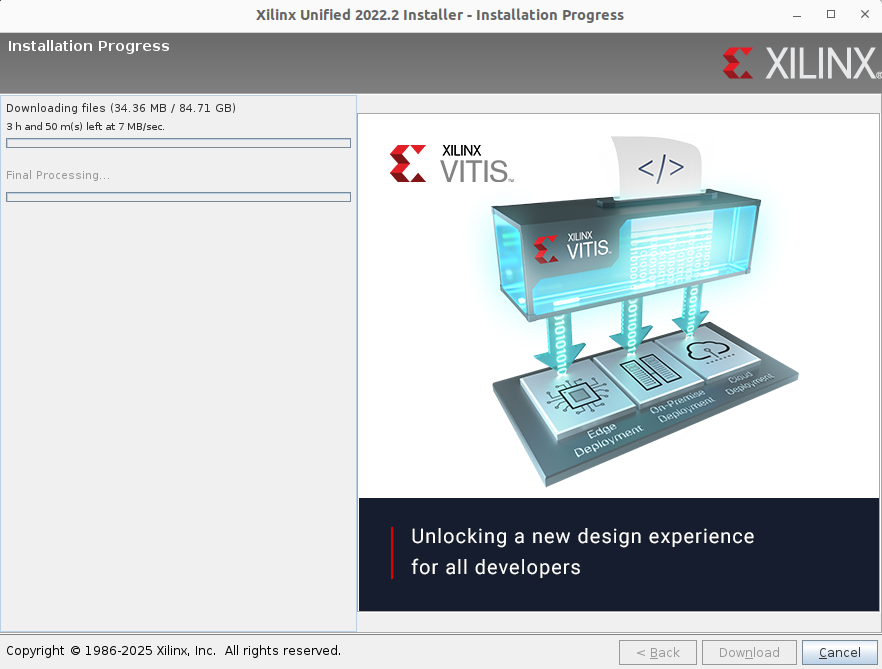
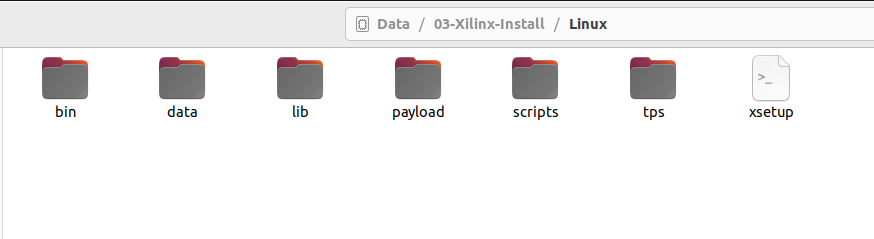
After downloading, we get the folder to save the files and folders used for installing Xilinx Vivado as follows:
Step 3: Installation
Open the folder save the files and folders used for installing Xilinx Vivado in Step 2 with a new Terminal window.

run xsetup file.
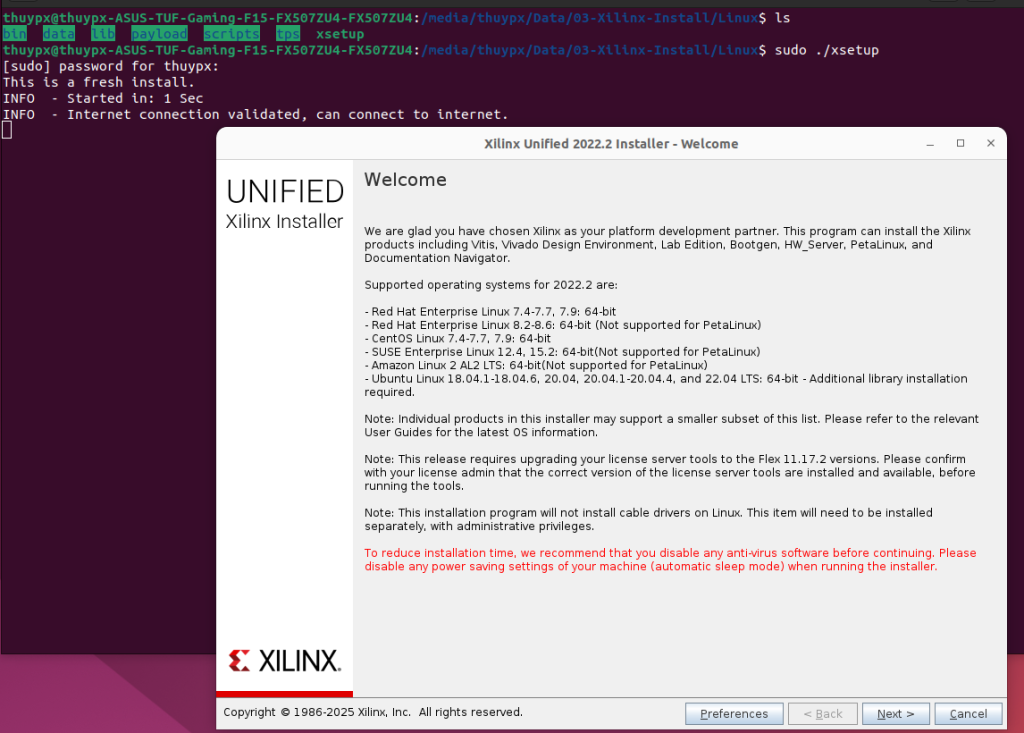
Click Next
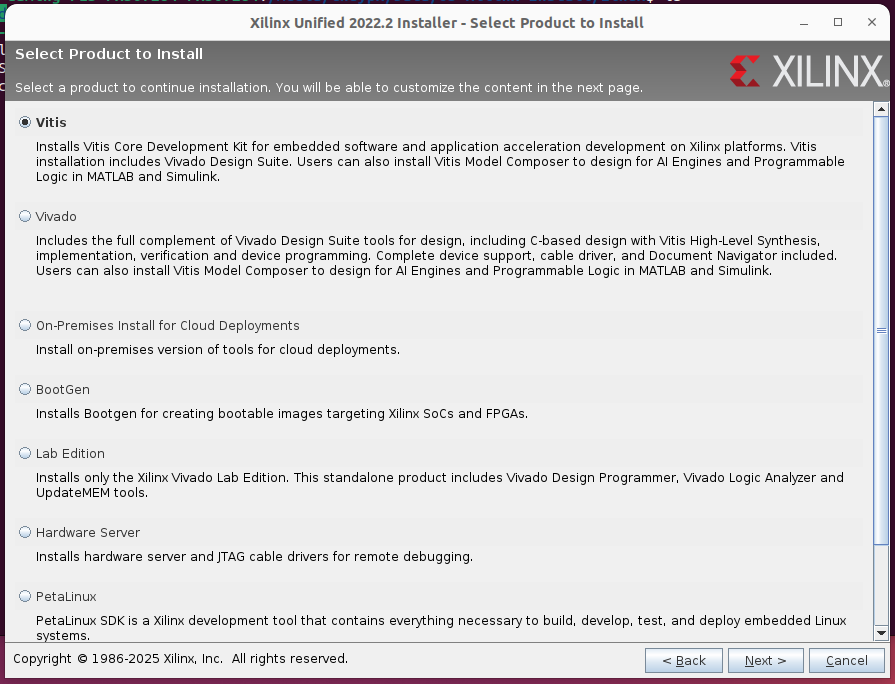
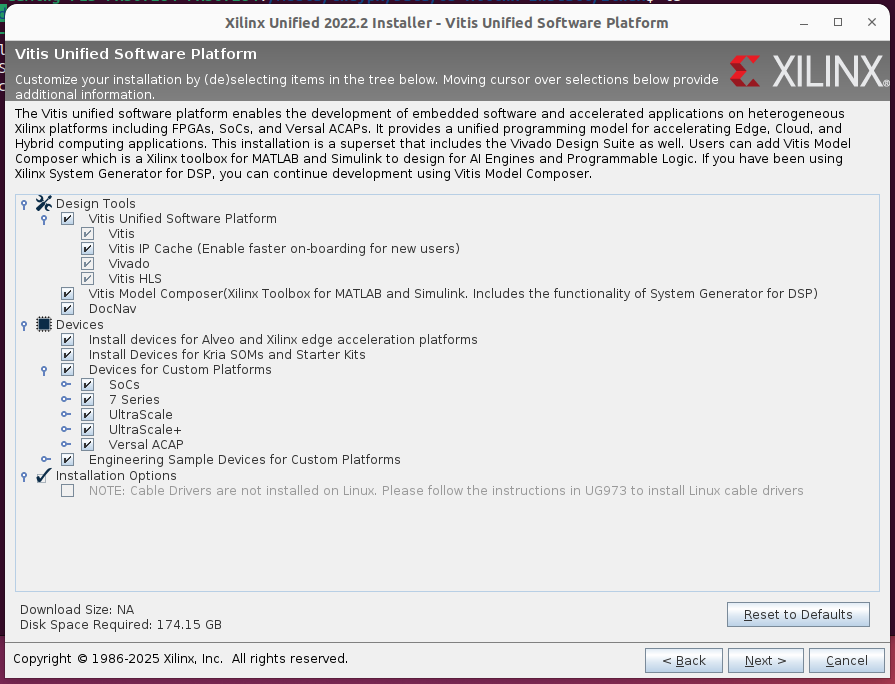
Click Vitis > Next
Click Next
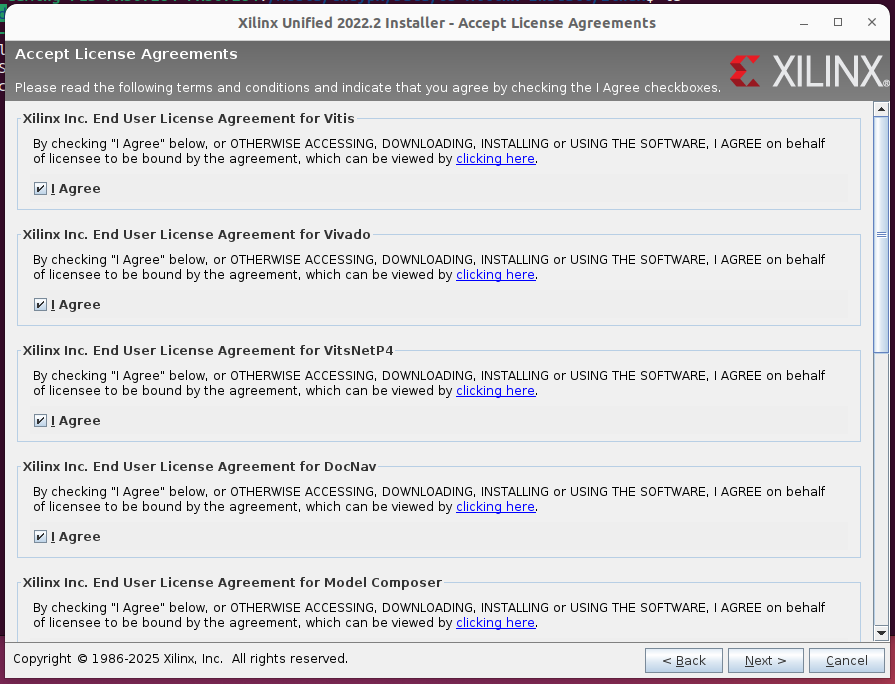
Click I Agree > Next
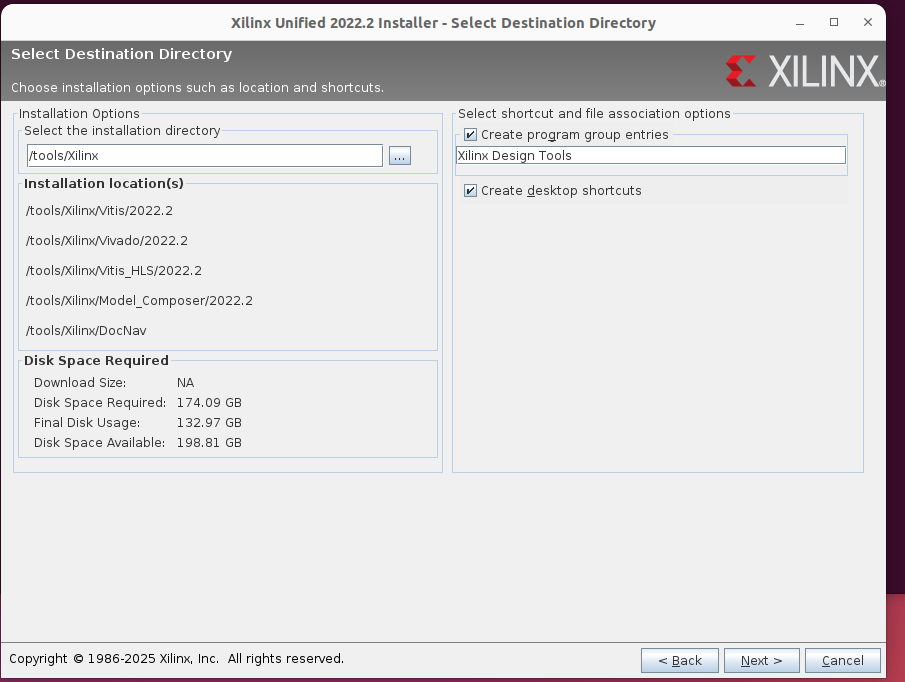
The directory containing the installation of Xlinx Vitis is /tools/Xilinx , please note that the installation directory needs to have at least 180GB of free space.
Click Next
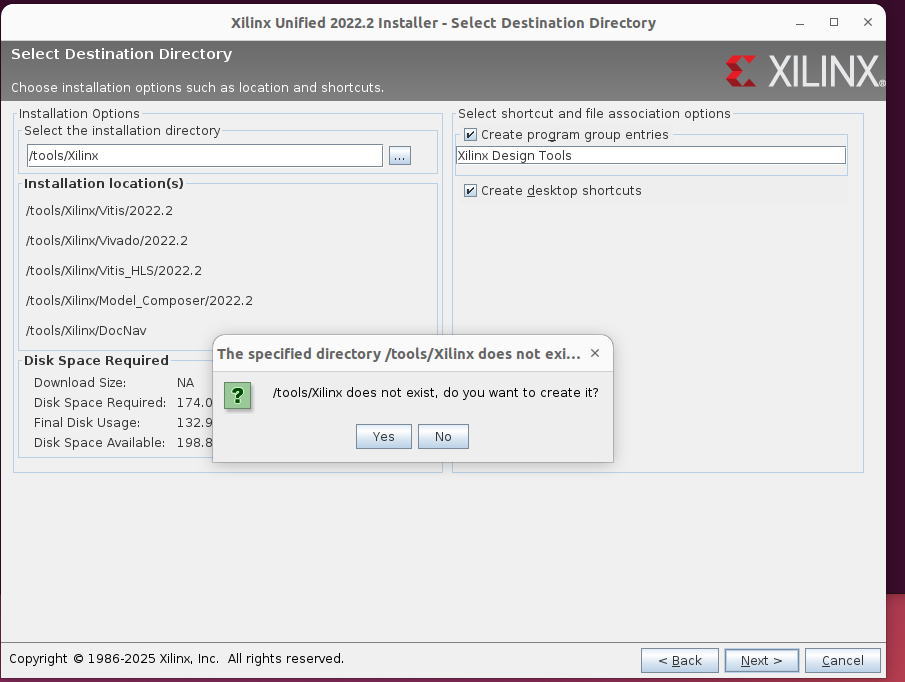
Click Yes

Click Install
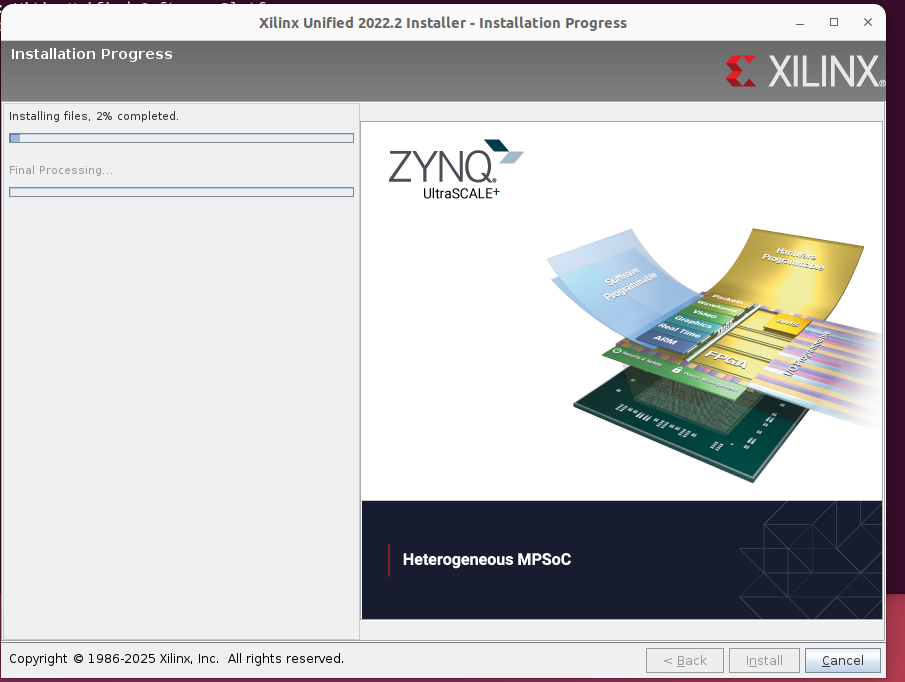
the installation process begins.
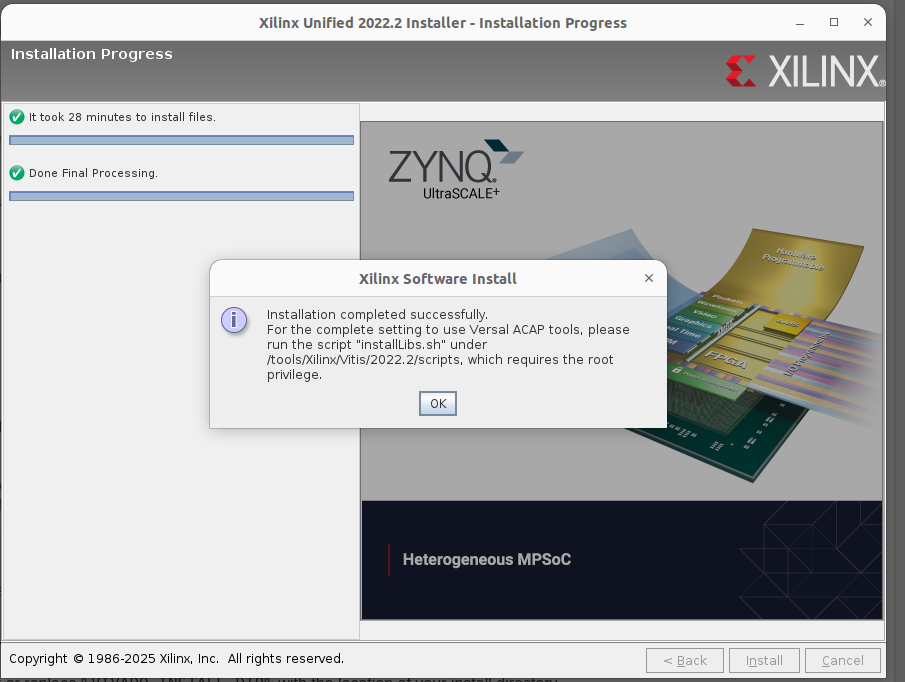
Installation complete.
Step 4: Setup environment for Shell, Bash shell
$ cd # return to home directory
$ nano .bashrc
Add the following line to the end of the .bashrc file:
source /tools/Xilinx/Vivado/2022.2/settings64.sh
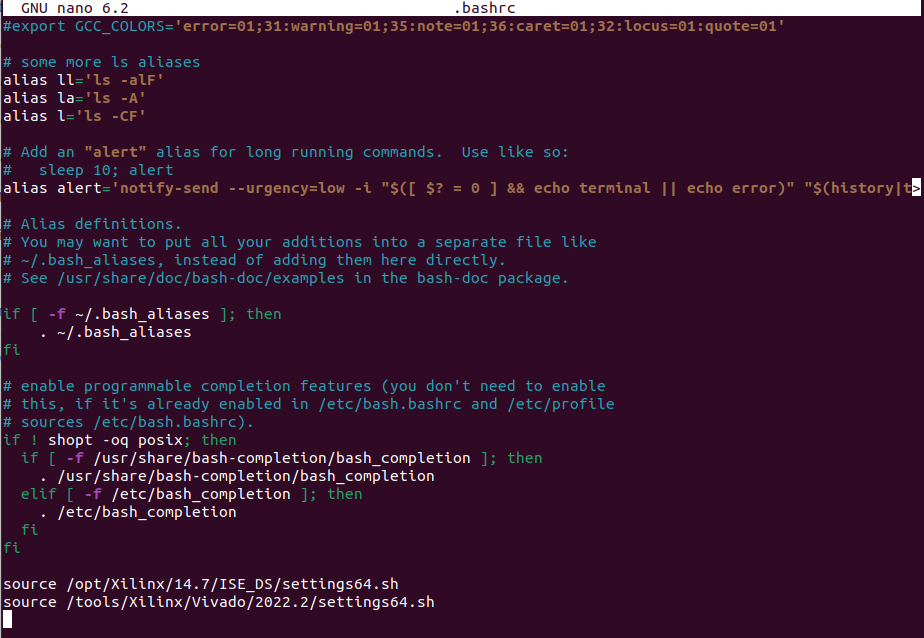
$ exit # note – exit all terminal windows you have open, to reopen a new terminal.
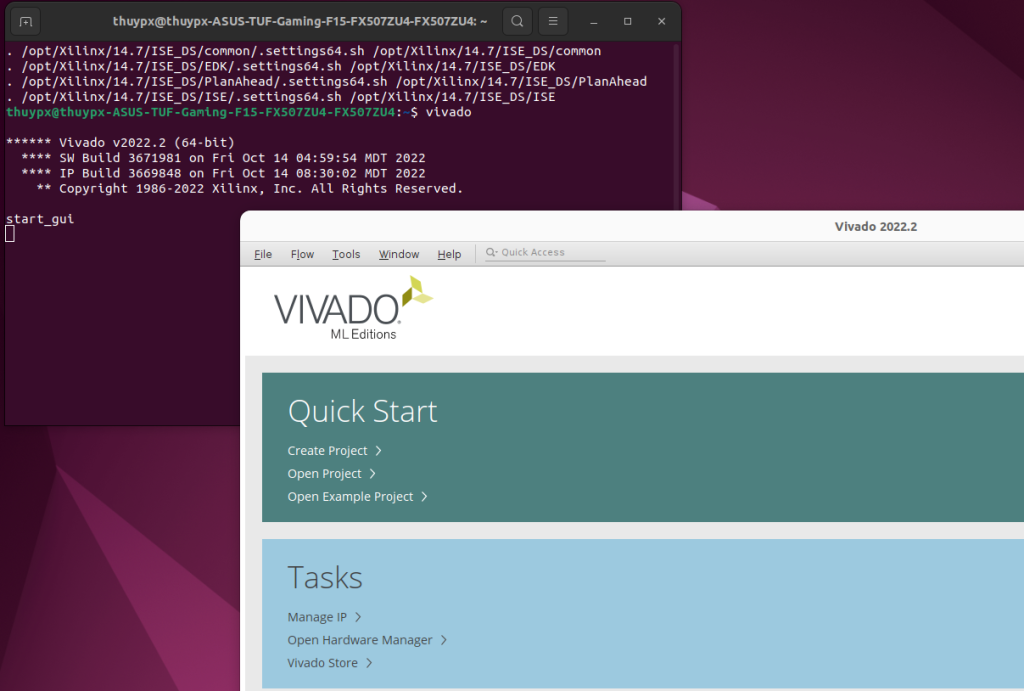
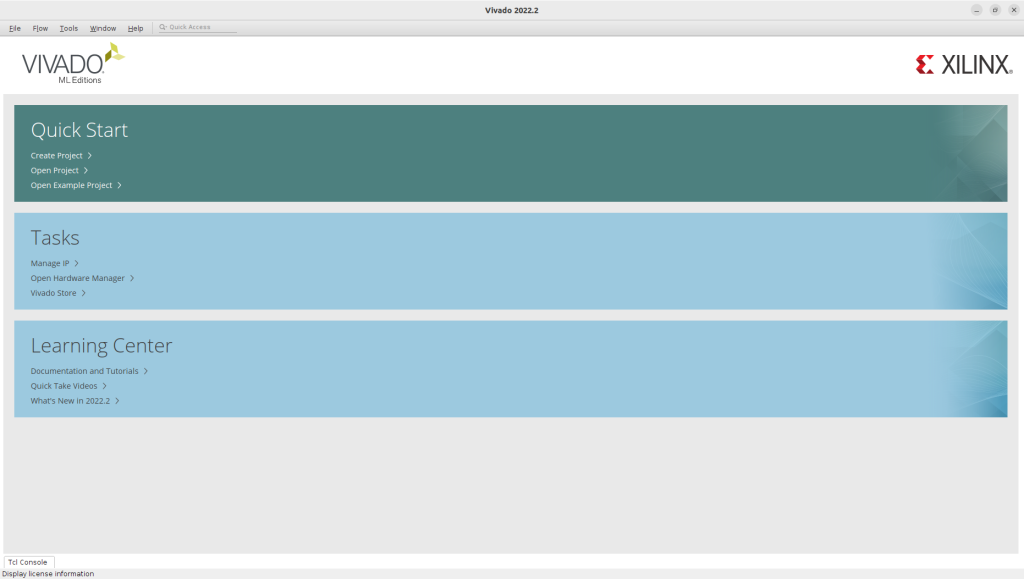
When you turn on a new terminal, you will see the environment set up, and then you type vivado and Vivado will pop up.
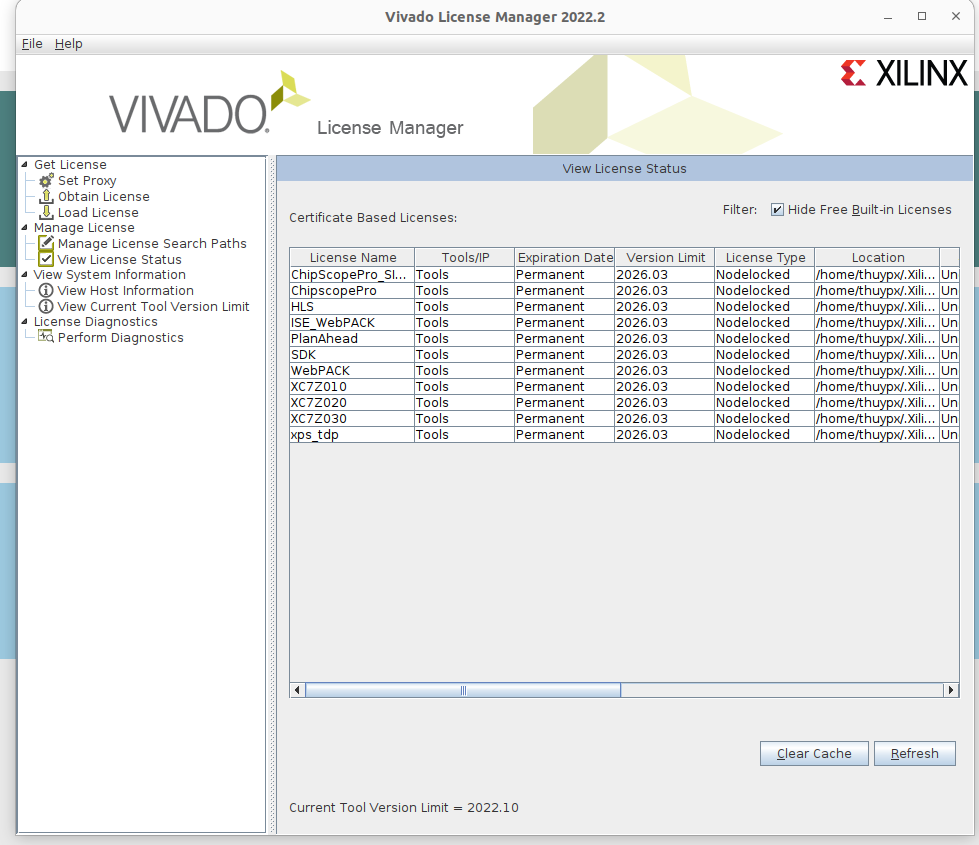
Step 5: Add Free License for Xilinx Vivado
=> How to create a License file, please refer to the following article:
(About XILINX ISE and How to install XILINX ISE WebPACK Tool 14.7 on Ubuntu 22.04 LINK HERE)
=> Open Vivado software > select Help > select Manage License.
the Manage License window open.
Step 6: Create Xilinx Vivado launcher
=> 6.1/ Go to the folder /tools/Xilinx/Vivado/2022.2/doc/images and copy file vivado_logo.png to create the icon.
Go to /usr/share/applications folder, create folder: vivado_2022_2 and paste icon file (vivado_logo.png) into this folder.
Then we have the link of the icon file as: /usr/share/applications/vivado_2022_2/vivado_logo.png
$ cp /tools/Xilinx/Vivado/2022.2/doc/images/vivado_logo.png /usr/share/applications/vivado_2022_2/
=> 6.2/ Create the desktop file
$ nano XILINX-Vivado-ML-2022-2.desktop
Copy and paste the following line to desktop file.
[Desktop Entry]
Type=Application
Name=XILINX Vivado ML 2022.2
Comment=Vivado (XILINX Vivado ML 2022.2)
Icon=/usr/share/applications/vivado_2022_2/vivado_logo.png
Exec=bash -c "source /tools/Xilinx/Vivado/2022.2/settings64.sh && vivado"
Terminal=true
Path=/usr/share/applications
Name[en_US]=XILINX Vivado ML 2022.2
Categories=Development;IDE;
$ sudo cp XILINX-Vivado-ML-2022-2.desktop /usr/share/applications
=> 6.3/ After each change to XILINX-Vivado-ML-2022-2.desktop, you need restart your computer for the changes to take effect.


Trứng vịt lộn um bầu
Có thể bạn cũng thích
About Quartus Prime and How to install Quartus Prime Lite 23.1.1std on Ubuntu 22.04
Tạo ảnh hài hước, tạo ảnh theo trend